When you buy through our links, we may earn a commission. Learn more .

Where to Buy RV Paneling (Ceiling, Wall, Side Panels) 2024

What Is RV Paneling?
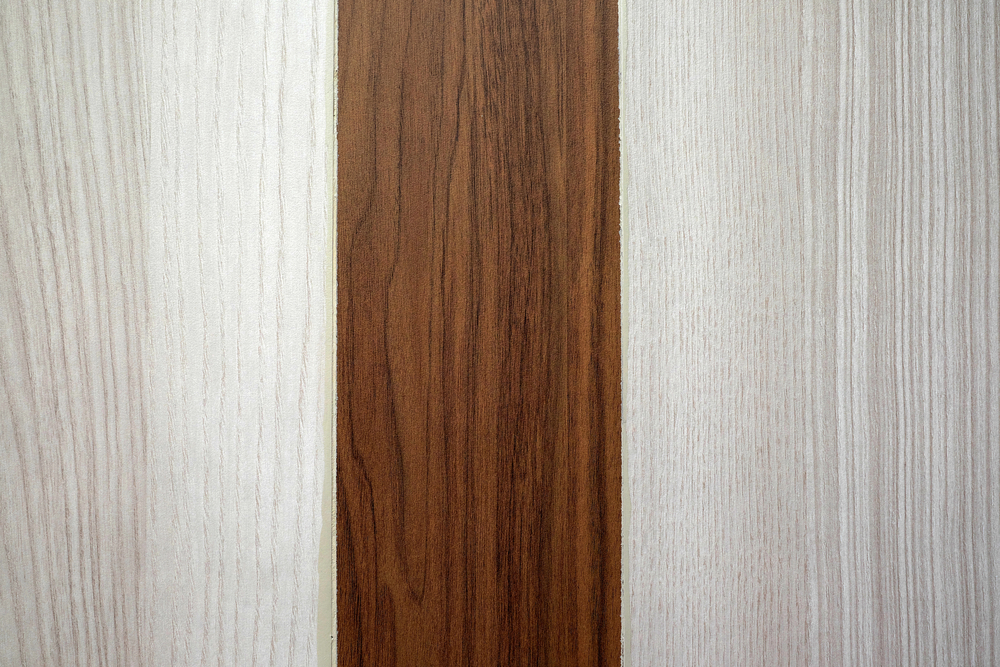
If you’ve ever looked inside an RV, you’ve probably noticed that the paneling used on the ceiling differs from the paneling used on the walls.
RV ceiling panels are often made of FRP or PVC. It’s lightweight, moisture resistant, and is white without needing to be painted.
Related Product: Did you know RV Propane Detectors (click to view on Amazon) need to be replaced every 5-10 years? Make sure yours is still up to date before your next camping trip.
RV wall panels are usually made with thin plywood or MDF (medium density fiberboard) with wallpaper stuck to it.
On high end campers, you will sometimes find vinyl paneling used on the walls as well.
The ceiling also has a base layer of plywood as well but they have added the vinyl or PVC paneling over it.
So why would you need to get your hands on some RV paneling?
Mold and water damage is the number one reason people need to replace the walls or ceiling in an RV.
It’s a problem that needs to be taken care of right away before more than just the paneling needs to be replaced.
Related: RV Condensation And 14 Ways To Prevent Mold In Your Trailer
It’s also common for camper paneling to get a little beat up from things falling during travel and general use.
In a small RV, it’s easy to accidentally bump into things and break them.
Or you might just be remodeling an old camper or even building one inside of a van or school bus.
Whatever the need, this post is just to help you understand how simple RV paneling is and give you some ideas for what to use to decorate the new panel once you’ve nailed or stapled it in place.
Table of Contents show What Is RV Paneling? Where To Buy RV Wall & Ceiling Paneling The Hardware Or Lumber Store Online How To Install RV Paneling How To Make The New RV Paneling Look Good RV Wall Panels RV Ceiling Panels Frequently Asked Questions About RV Paneling What materials are used for RV walls? How thick is RV paneling? How do you install RV paneling? How do you repair a rotted RV wall? Do RV walls and ceilings have studs? What Is FRP Paneling?

Where To Buy RV Wall & Ceiling Paneling
The hardware or lumber store.
1/8 inch plywood, utility paneling, or MDF boards from your local hardware store is perfect for replacement RV wall paneling.
For RV ceilings, you can normally find some FRP board at hardware stores as well.
Hardware stores are a fantastic place to get RV paneling because they often have larger board sizes and some places will even cut the panels to size for you.
A thin lightweight board that’s stapled to the wall studs or ceiling supports is really all the inner walls are made of.
The tough part about installation will be cutting out areas where there are cabinets, windows, and outlets.
See Also: What Backup Camera Is Your RV or Trailer Pre-Wired For?
Getting large paneling online can be a bit of a challenge.
Many online retailers often charge high shipping rates for the size of RV panels you are going to need.
Large hardware stores with online shopping like Home Depot and Lowes are a good place to look first.
If large wood boards aren’t a good option for you, shiplap is a fantastic way to replace the paneling in an RV.
It comes in smaller pieces that are easier to manage and cut. It also looks fantastic inside campers, vans, and skoolies.
This Timeline Shiplap (click to view on Amazon) is made of 3/16 inch thick MDF boards that are 72 inches long and 5 inches wide.
It creates a lightweight and realistic looking shiplap that is pre-painted white.

It’s going to look awesome and you don’t need to track down any 1/8 inch plywood to put up first.
Because shiplap is small boards you put together like a puzzle, it’s easier to cut to fit around cabinets and windows.
Another benefit to this type of shiplap is there’s no more work once it’s installed because it comes pre painted and ready to go.
See Also: 7 Must Haves For Organizing Small RV Kitchens & Cabinets

How To Install RV Paneling
Most RV paneling is stapled directly to the studs in the walls or the support beams on the ceiling.
If you look closely, you can often see the putty they used to cover the staples.
Some RV manufacturers don’t even go that far. They just staple up the panels and leave it at that.
If you are planning on covering the wood RV paneling with some wallpaper or vinyl panels, nailing or stapling the panels directly to the studs will work just fine.
If you are installing shiplap, like the one linked to in the section above, you will also be able to nail it directly to the studs.
Just make sure you put the nails on the part the next board will cover.
See Also: How To Wire Multiple 12V Or 6V Batteries To An RV

How To Make The New RV Paneling Look Good
Rv wall panels.
Once you’ve replaced the wooden part of the RV wall, you are going to need to get some paint, wallpaper, or vinyl paneling to make it look good.
If you only needed to replace a small section or one wall inside your RV because of mold damage or something else, you can make it look good without having to redo the entire camper.
Brick (click to view on Amazon) or wood panel (click to view on Amazon) patterned peel and stick wallpaper will create an accent wall.

Accent walls add an extra element of design and coziness to homes, so why not use them in RVs as well?
Another, more modern option, that works well on camper walls and ceilings are 3D PVC panels (click to view on Amazon) .
These are often sold in large squares that are lightweight and very easy to handle. You can simply glue or nail them in place.

Most RVers prefer using wallpaper and stick on paneling instead of paint because it’s easy to install and doesn’t require multiple coats of special paint that can stick to the wallpaper on the original RV wall paneling.
It’s also a lot less messy and there’s minimal prep work.
See Also: Best Portable Power Station/Solar Generator For Camping
RV Ceiling Panels
The 3D PVC paneling I linked to above works on camper ceilings as well, but you can also use ceiling tiles like these (click to view on Amazon) for a vintage look.

If you want to follow the trend you can go with the famous copper version (click to view on Amazon) .

It goes well with the common brown interior older RVs normally have, looks unique, and adds a little flair.
It’s a simple way to make things look a little more stylish.
If you needed to replace an RV ceiling panel because of water damage from a leaky skylight or vent, it’s a great upgrade.
See Also: Is Your RV Fridge Not Cooling? Try This One Simple Trick
Frequently Asked Questions About RV Paneling
What materials are used for rv walls.
Normally, a camper’s walls are covered in 1/8 inch plywood or birch board that has a thin layer of wallpaper on it.
It’s lightweight and easy to stick wallpaper to, that’s why it’s the most common type of paneling found in a camper.
How thick is RV paneling?
RV paneling is normally only 1/8 an inch thick.
It can seem thicker if there’s another layer of PVC or vinyl paneling on it, but most companies keep the wall and ceiling paneling very thin to save on material costs and weight.
How do you install RV paneling?
Installing RV paneling is fairly simple. It’s nailed or stapled to the studs or ceiling supports that are already there.
The hardest part is cutting out the spots for windows, cabinets, and outlets.
You also want to be careful and keep an eye out for any electrical wiring or pipes in the walls.
How do you repair a rotted RV wall?
If it’s the camper wall paneling that’s been affected, you need to remove the entire piece and then some to make sure all the mold has been taken out.
Go to the local hardware store first and see what size of 1/8 inch plywood they have.
Cut out the paneling in your RV to match the width and length of the new piece.
If the studs are still in good shape, you can scrub off any mold on them, let them dry for a few days, and add some mold treatment (click to view on Amazon) .
If the studs are rotted, they are going to need to be replaced as well.
See Also: RV Condensation And 14 Ways To Prevent Mold In Your Trailer
If you don’t get all the mold, it will just keep coming back. It might seem like a lot of work, but it’s worth it to get it all out the first time.
After nailing or stapling on the new wooden panel, you face two options.
You can remodel all the walls in the camper to match the new wall or just turn the new panel into an accent piece.
Easy to install peel-and-stick wallpaper with patterns like brick (click to view on Amazon) make it seem like it was redone on purpose.
This works especially well if you are replacing the back wall in an RV.
Do RV walls and ceilings have studs?
Yes, they do.
Inner walls are always going to have wooden studs, but if it’s an outer wall, the studs might be made of aluminum or steel, depending on what kind of camper trailer or RV you have.
Ceiling studs are normally wood, but there can be a few steel supports mixed in as well.
What Is FRP Paneling?
FRP stands for fiber reinforced plastic .
FRP paneling is thin, lightweight boards made with polyester resin and reinforced with fiberglass.
These kinds of panels are popular to use for the ceiling paneling inside campers because it’s already white, it’s very durable, lightweight, and easy to install.
Have any more questions about RV paneling? Leave a comment below.

16 thoughts on “Where to Buy RV Paneling (Ceiling, Wall, Side Panels) 2024”
How can I staple into the aluminum frame?
A heavy duty 18 or 16 gauge pneumatic stapler with the right kind of staples should be able to go through aluminum framing. But you could use thin self tapping screws or even try and hammer serrated paneling nails into the aluminum.
What kind of staples should I use?
Narrow crown staples like these ( click to view on Amazon ) are a good choice for paneling.
Visqueen? Pardon the speeling or somethi g starti g with a v? The.thin wood used in old vintage trailers? Is that what it called.thin paneling In the. 40s 50s
Hi Laurinda,
I’m not sure what the official name for it would have been but I think you might be thinking of Veneer Paneling (click to view on Amazon) .
It’s the super thin slices of wood paneling commonly used in RVs. You can also get veneer banding to go around difficult corners ( click to view on Amazon ).
It’s great stuff for RV use since it’s lightweight and easy to mount.
What language are you speaking?
is there anything different with campers like the 60’s Scotsman that used a “solid plywood construction”
I think the biggest difference is that they were constructed without studs. That means the frame and shape are made up of solid sheets of plywood.
Where can I purchase RV wood vinyl ceiling panels
If you mean just the regular panels that the ceiling is made of, Lowes has a wall panel that works great for RV ceilings.
the paper is peeling off my RV wallboard. can i paper on top of this What make of wall paper to do the job?
The wallpaper in RVs is similar to regular wallpaper. Before wallpapering over the top you should make sure that any peeling or bubbling wallpaper is removed so the new wallpaper has something solid to stick to.
I think any kind of wallpaper will work. If it were me I would use Peel and Stick Wallpaper (click to view on Amazon) .
It doesn’t require glue so there’s less risk of the old wallpaper peeling from the moisture, it’s very easy to hang, and it’s easy to remove if you ever need to fix anything behind it or change it.
FlexStone™ single interior decorative wall panels in a variety of stunning design styles.
Wall panels have patterns in a variety of stone look, marble look, granite look and onyx look styles.
The wall paneling sheets are made of PVC, stone powder and nano bamboo fibers.
The manufacturing process creates wall panels that are waterproof, mildewproof, durable, easy to clean & formaldehyde free.
Please visit our Website for complete info: https://flexstonedesign.ca/
Does anyone have suggestions for the outside? A piece flew off while driving back from a beach trip. It looks like water damage.
Leave a Comment Cancel reply
RV Paneling

Table of Contents
Owning a recreational vehicle can bring a lot of joy and enjoyment. At the same time, there can be a lot of work. Someone once said that a boat is a hole in the water that you pour money into, and an RV can be the land version of that saying, especially if you buy an older unit that needs a lot of work. Of course, doing that work yourself can save a lot of money, so don’t be dissuaded by that older unit. Someone who can do that work can turn that 30 or 40-year-old motorhome into a traveling luxury palace for a very reasonable price.
The most common problem with RVs is leaky roofs and the problems those roof leaks can cause. When water from the roof invades the thinly paneled walls, it doesn’t take long for the damage to begin. Often, that damage isn’t seen until it is rather severe because of the time an RV can spend parked, just waiting until the next time it is used.
As the water soaks into the paneling, it causes delamination, which is not made with an exterior-grade adhesive. As the wood delaminates, bacteria start working on it, decomposing it. This usually isn’t found until visible areas become damaged, but under further investigation, a larger hidden damaged area is encountered.
RV paneling is thinner than home paneling, usually only 1/8 inch thick. Like most paneling, it is a three-ply plywood product consisting of a thicker core with two veneer faces. In most cases, the face layers are not hardwood, as they are usually covered with wallpaper , often before they are installed. While there are thicker versions of this paneling, measuring in at 3/16” and 1/4”, those are not as commonly used.
This paneling isn’t available at most lumberyards and home improvement centers. You have to go to an RV repair or supply center, and even then, you might have to special order it. Finding an exact match may be difficult, especially matching the wallpaper. It is often necessary to redo the wallpaper on the entire wall or room, to finish out a repair.
How RVs are Built
Before repairing RV paneling, it helps to understand how it is built. This has changed over time, so we’ll have to look at two different methods. All RV walls are thin, usually measuring no more than 1 ¼” in total thickness and sometimes only 1 inch.
All RVs start with some chassis. In the case of trailers, the RV manufacturer usually makes the chassis using commercially available axles and other running gear. The structure sits on two main frame rails, spaced roughly one-third of the RV’s width apart, with crossbars going out to the outer walls. The subfloor and floor covering is installed on this, often before the walls are attached.
The interior walls of RVs normally aren’t designed to provide structural support for the roof. They may do so incidentally if the roof sags sufficiently to put pressure on them, but it is just as likely that the sag will cause the interior wall to buckle rather than provide support.
Older RV Construction
Older RVs and those made by smaller manufacturers are stick-built, much like framing a home. The exterior frame for the walls and roof is built onto the chassis out of individual pieces of square aluminum tubing and aluminum C-channel riveted together. Interior framing is usually 1”x 2” furring strips. There might also be some wood strips in the exterior walls, providing something to nail the paneling to.
The outer aluminum skin of these units is usually riveted to the structure, although it might be bonded with adhesives. One-inch-thick Styrofoam sheeting is typically used for the insulation, and the inside is either glued to the structure or brad-nailed in cases where wood is used in the structure.
The roofs on these older units are usually flat, with rectangular tubing spanning the full width. This can lead to sagging, either from the weight of the air conditioner or from the weight of storage pods on the roof. Sagging roofs are a major cause of leaks, especially around the air conditioner.
Newer RV Construction
Many RV manufacturers, especially the larger manufacturers, have switched from the abovementioned construction technique to making their walls and roofs as one-piece laminated constructions and then assembling them together to make the RV shell.
Usually, these walls are made with fiberglass skin, which is laid up first. Before the resin cures, the framework is laid in place, with the aluminum pieces riveted together. Then, once the rosin for the fiberglass cures, the expanding urethane insulation is sprayed in, and the interior paneling is set in place. The whole thing is held together in a low-pressure press until the expanding foam insulation has had time to cure. This insulation also acts as an adhesive to hold the entire thing together.
The first step in repairing any damaged RV paneling is ensuring the roof leak is solved. Roof leaks on RVs can be extremely hard to locate because the water seeping in through whatever hole in the roof can travel some distance inside the roof before coming out. At both points, the entry and the exit, that water is going to need a hole to go through.
When looking for a roof leak, check all the seams, vents, the air conditioning unit, and anything else that pierces the roof. Even the seemingly smallest hole, plugged by a screw, can cause a leak if it is not sealed properly. I had a serious leak in a motorhome roof caused by a hole underneath a bracket for the railing around the back end of the roof. It came from the factory that way and was invisible until the railing was removed. Yet the leak caused considerable damage to the inside of the motorhome.
If the leak isn’t apparent, it can be helpful to wet down the roof, especially on older RVs with sagging roofs. Wetting it down will help identify areas where water puddles, allowing for a more focused investigation.
Does the Paneling Need Replacement or Not?
Before rushing to replace the paneling on an RV, decide if it is really necessary. Paneling behind the oven or covering the walls inside of cabinets doesn’t necessarily need to be replaced. The rotted part of the paneling can be removed, leaving whatever remains. As long as the leak is stopped, any damaged insulation can be replaced using spray-in urethane foam insulation, and the area can be painted .
If the damage is bad enough in one of these hidden areas that it needs to be covered, one option, which does not require replacing the paneling, is to cover the damaged area with a door skin. These can often be purchased at RV repair supply houses. While a patch of this type may be a bit obvious, if it is inside a cabinet and the patch is cut to the full size of the cabinet, it may not be noticed.
Replacing RV Paneling
If visible paneling needs to be replaced, it can be. However, the process is a bit more complicated than replacing paneling in a home due to the furnishings in the RV and the way the paneling is bonded to the structure.
Start by removing everything attached to the wall: cabinets, furnishings, pictures, and anything else on there. If there is a window or door in the part of the wall where you are replacing the paneling, you’ll need to remove those, too. If your RV has trim on the floor and ceiling, try to pry it off without damaging it. Most likely, it will be installed with brad nails.
With everything removed from the wall, it’s time to remove the existing paneling. This will be difficult, as the paneling is stuck to the framework with some sort of adhesive .
It is usually best to work from whatever rotted area outwards, as that will probably give you an edge that you can slip something under to try and separate the existing paneling from the structure and insulation. Large putty knives are normally used for this, but a Japanese pull saw, like a Ryoba, works even better. Cut the paneling into sections, pry them off, and then scrape the remaining wood fibers and glue off the structural members.
Most adhesives will soften when heated, so using a heat gun or blow dryer can be useful in getting the glue off the structural members. For the best possible bond and to prevent waviness from having globs of glue and wood fiber on the structure, it is best to get as much of the glue off as possible. The heat gun may damage the insulation, but that can be replaced.
While scraping, remove the putty acting as a sealant under the window or door frame. This must be replaced with a new sealing putty, which can be purchased at an RV repair parts house.
Cut the individual pieces of paneling to fit. In cases where difficult contours may need to be cut or where it might be difficult to fit the pieces in place, it can be useful to make a pattern out of cardboard first, ensuring that it will fit and then transferring that contour to the paneling for cutting. Don’t bother cutting out window and door openings, as those can better be cut once the paneling is installed. Ensure that all edges of the new pieces of paneling land on a structural support element.
Because of the thin face veneer on the paneling, it is a good idea to stick masking tape to the surface while cutting and cutting from the pane’s back side. These measures will help reduce splintering caused by the blade’s side rubbing on the cut edge.
Before installing the new paneling, the insulation needs to be installed. There are three ways to go about this:
- Cut sheets of 1” Styrofoam insulation, available at any building materials center, and glue them in place.
- Cut fiberglass batts of insulation and glue them in place. If you can’t find R-5 batts, you may need to buy thicker batts and cut them down. Be sure to wear gloves when handling them.
- Use expanding urethane foam, often sold for gap filling. To do this, a scrap plywood covered with waxed paper should act as a mold. The insulation should be done in sections the size of the scrap plywood. Once dry, any excess protruding out can be cut off.
With the insulation in place, it’s time to install the new paneling. It needs to be installed with some adhesive. The best is a relatively slow-drying two-part epoxy (30 min. to 1 hr.). Construction adhesives can also be used, but it will be more difficult to compress the adhesive enough so the paneling is right up against the structural element. Silicone caulking can also be used, as it is a good, flexible adhesive.
Before applying the glue, test fit the part and dry clamp it in place to ensure that there are enough clamps and that the clamps won’t leave any points loose. In many cases, it will be better to put a 2”x 4” or other board up against the paneling and clamp it to the wall, allowing the clamp to cover a wider area.

Apply the glue, set the panel in place, and clamp it, leaving it there long enough to ensure the adhesive has fully cured or dried.
With the clamps removed, window and door openings can easily be cut out with a jigsaw, using the outer skin as a template. Take care not to overcut, as it will require repairing the outer skin. Reinstall trim, windows, and any furnishings removed to make the repair.
Other Options to Consider
The process of replacing paneling in RVs is rather difficult and time-consuming, although it doesn’t require any extraordinary skills or tools that the average handyman doesn’t have. However, it is easy to see why many would want to avoid the project, seeking an easier way to repair their RV’s walls.
To save work, new material can be overlaid on the damaged paneling. This can be new paneling or:
- Tongue & groove wall planks
- Tongue & groove wood flooring
- Textured aluminum or stainless steel
- Upholstery fabric
- Kydex plastic (commonly used for interior trim pieces on buses and airplanes)
- Fiberglass panels
- Ceramic wall tile (not highly recommended)
Anything you can mount to a wall in a home can be mounted on the interior walls of your RV. The one thing you want to consider is the weight. RVs are heavy enough as they are, and they aren’t designed to add a lot of additional weight. So, when it comes to materials like stainless steel and ceramic tile, they’re fine for small areas but might not be good for larger areas.
The other consideration is flexibility. The walls of an RV will flex somewhat as the vehicle goes down the road. That makes it extremely difficult to keep ceramic wall tile and other materials that do not flex on the wall. Materials with some flexibility, attached with adhesives that also have some flexibility, are the best option.
Use adhesive across the entire repair surface area as much as possible rather than just gluing the perimeter and an X on the back of the wall covering. While a smaller amount of adhesive may work, it is also much more susceptible to cracking due to flexing, as there will be edges of the adhesive where the cracking can occur.
Related Posts:

RV Paneling
- Interior Parts
The walls of your RV take a lot of abuse. While they are a substantial part of the overall structure of your RV, they also flex, bend, sway, expand, and contract with life on the road. The forces and temperatures that assail your rig affect your paneling, and eventually, it will begin to crack, warp, and fade. When it’s time to replace your paneling, RecPro can help you build that wall.
There are no products listed under this category.
Our solid sheet constructed paneling is an excellent foil for any color you want to apply to your interior. The smooth surface won’t interrupt the flow of your design palette and allows for easy installation of pictures, lighting, and fixtures. The paneling is extremely lightweight which makes for not only easy installation, but it also helps to mitigate the weight profile of your RV which will lead to savings on fuel over time. This paneling is excellent for repairs and upgrading the interior of your RV. When you’re ready to build up your wall(s) order some sleek and sturdy paneling from RecPro.
- Dimensions – 4’ W
- Dimensions – 8’ L
- Dimensions – 1/4" T
- Lightweight
- Solid surface
- Easy to install

You are here: Home // Replacing RV Wall Paneling: A Complete Guide
This post may contain affiliate links or mention our own products, please check out our disclosure policy .
Replacing RV Wall Paneling: A Complete Guide
Published on May 1st, 2022 by Kendall Jennings

Update Your RV With New Wall Paneling
Although not a very common job, replacing RV wall paneling may be something you are faced with at some point.
In a worst-case scenario, you have water damage and need to remove wall paneling to properly repair it. You may also be replacing RV wall paneling with another surface for an upgraded look.
Either way, removing RV wall paneling can seem like a difficult and even scary job. This guide will ease your concerns and walk you through the process. When planned out and done properly, replacing RV wall paneling is actually a very doable DIY project.
DON’T MISS OUT ON DO IT YOURSELF UPDATES
Sign up for the newsletter today.
Please enter a valid email address.
An error occurred. Please try again later.
Thank you for subscribing to the Do It Yourself RV newsletter, keep your eye on your inbox for updates.
Before you remove the paneling.
Pulling the wall paneling off can be unnerving for a couple of reasons. Firstly, will you ever get your RV back together as it was, and secondly, what will you find behind the paneling?
If you are removing the paneling for repair reasons, there is a good chance things will be worse than you expected. Water damage is the most likely reason you will be replacing RV wall paneling for repairs, and water damage spreads far and fast.
Whatever your reason for removing the wall paneling, you must be prepared to deal with any issues you find inside the wall. Water damage, mold, dead rodents, whatever it is you find—once you see it, you have to deal with it. Your plan to just remove a small section could easily grow to an entire wall.
Electricity and plumbing
There is a good chance there will be electrical, plumbing, or both in the wall you are working on. It is important to shut off the power and water supplies before starting.
A wire detector is a great tool to quickly scan for electrical wires running through the walls. Many stud finders have them and they’re a cheap investment.
In most cases, you will be able to remove RV wall paneling with little to no cutting. However, if you are cutting, it is very important to be careful of any systems that may be behind the paneling. Remember, sometimes electrical and plumbing lines can be run in unpredictable ways. RV construction doesn’t always make sense.
Required tools and supplies
It’s a good idea before starting any job to gather everything you need to complete it. This job requires only a few basic tools and supplies.
As mentioned above, a wire detector combined with a stud finder is a smart choice. RV wall paneling is usually easily located, as it is generally fastened to each stud. In some cases, however, you may need to locate the next stud, and knowing where the wires are is an important feature.
A multidriver with the bits for the three main screw types—Robertson (square), Phillips (star), and slotted—will be needed. There will likely be items that need to be removed from the wall before you can start.
A small pry bar and hammer will be useful to lift the edges of the paneling. The thinner the better for the pry bar teeth. There is no serious prying that needs to be done; it will be more of a light encouragement.
Seals, seams, and old paint may need to be dealt with, and a blade knife is an easy answer. Running it along the joints you are separating will help free up the panels.
Removing RV Wall Paneling
No turning back now; it’s time to pull back the curtain and see what’s back there! One thing you will almost certainly see is construction debris from when the RV was built.
Sawdust, screws, and offcuts from plumbing and electrical are all commonplace. This is a great time to clean everything that was left behind by the manufacturers.
In most cases, RV wall paneling will be joined to wall studs. The wall stud will have a plastic track in the center to receive another cap for the joint. These caps simply press into the track fastened to the stud. To remove them, start a corner with a flat screwdriver or thin pry and peel the cap from the track.
A second option manufacturers use is seam tape. This is simply a tape matching the color of the wall paneling that covers the seam. When removed, it will most likely have to be replaced with a new tape. Having it centered over the joint is important to completely cover the length of the seam.
With the cap or seam tape removed, the edges of the wall panels will be exposed. Small finish nails, or more commonly staples, are used to fasten the panels to the studs. It is very difficult to remove both of these, and in most cases, they will be pulled through the panel and remain in the stud.
This is okay; however, you will have to remove all the staples or nails from the stud. Pliers are your best bet for this annoying job.
The panel will most likely be fastened to all studs and also to the top and bottom plates where the wall meets the floor and ceiling. It is best to remove full panels rather than cutting panels. The joints are located on studs for support, so the joints can be covered easily.
Removing RV wall paneling between joints will result in a difficult job securing that new joint when you replace the paneling. If the paneling you are removing is being replaced with new paneling, the removal process can be made easier by cutting panels if needed.
Replacing RV Wall Paneling
Before replacing the paneling, it is important to make sure any damage or suspected issues are dealt with.
If you are reinstalling the old paneling, care should be taken when removing it to keep the edges in as good of condition as possible. There will be less than one inch of stud surface to attach the panel edge.
Staples or small finish nails will be used to attach the panels to the stud. The edges will butt up against the edges of the track in the middle of the stud. When the panel is fully secured on the studs and top and bottom plates, the plastic cap can be pressed back into the track.
Upgraded Paneling
Whether you had planned on doing some remodeling or not, this is a great time to add some character and replace that boring wall paneling.
One consideration to make in replacing the paneling with a different type is the thickness of the new paneling. Anything that protrudes through the wall paneling will have to be double-checked to ensure thicker paneling won’t cause any issues.
Wainscoting and shiplap are both popular choices for upgrades. RV wall panels are cut to size, whereas any upgraded paneling will likely have to be cut to fit. If you are unable to have pieces that extend from stud to stud, you may have to add a stud to make things easier and add support where needed.
If required, a stud the same size as the existing ones can be added with corner brackets . This may allow you to better utilize the dimensions of the paneling you are using.
The plastic track for the joint cap will likely not be used in this case, and it can be removed from the studs. Larger track and cap systems can be used, or a simple piece of wooden trim can be nailed with small finish nails over the gap.
You don’t want to butt the panels tight, as the RV will move around, and this can cause issues such as the joint buckling. If the original paneling is free of water damage or mold, shiplap and wainscoting can be applied over the top, which makes the job easier.
Replacing RV wall paneling can be a great way to upgrade your interior or may be necessary to repair the damage. Whatever the reason, it isn’t as scary of a job as it may seem at first.
Take your time with the removal, especially if you plan to reuse the panels. If new paneling is being used, realize that some modifications may have to be made. Once you’ve put everything back together, you can feel confident there is nothing hiding inside your walls and you may have a fresh new look in your RV.
Make sure you keep track of all your RV maintenance and repairs with an online tool such as RV LIFE Maintenance . Not only can you keep all of your documents in one place, but you’ll also receive timely reminders when maintenance is due to help you avoid costly repairs and potentially serious accidents.
Continue reading:
- 7 RV Interior Paint Ideas For Your Next Renovation
- 10 Do It Yourself RV Projects To Do This Spring
Share this post:
Related posts:.

Preventing Water Damage Following RV Plumbing Repairs

RV Tire Pressure: Your Essential Guide to Safety and Maintenance

How To Repair or Replace an RV Vent Fan
Where To Buy RV Paneling? (Ceiling And Wall Panels)
Embarking on your RV journey means ensuring every aspect of your mobile home is tailored to your comfort and style. That’s where knowing where to buy RV Paneling becomes pivotal. As you transform your RV’s interior into a cozy haven, selecting the right paneling is essential. After all, your surroundings should exude warmth and functionality, whether you’re lounging, sleeping, or preparing meals.
Upon stepping into an RV , the difference between ceiling and wall panels becomes immediately clear. While both serve structural purposes, their aesthetic and functional differences are striking. Ceiling panels generally prioritize lightweight materials to minimize RV frame strain. On the other hand, wall panels often prioritize durability and insulation, protecting against external elements and maintaining a comfortable internal climate.
Knowing where to buy RV paneling is a crucial consideration in designing a comfortable and visually appealing interior for your mobile home. So, if you want to know a few options on where to buy RV paneling, you can continue reading here.

Different RV Panels
You’ll notice that the interior wall panels for an RV are typically made out of MDF or a thin type of plywood, though more expensive RVs might use vinyl paneling instead.
These are all good materials, and RV-owners will then apply wallpaper over them.
Meanwhile, the panels that are used on the RV interior’s ceiling are typically made out of PVC or FRP (fiber-reinforced plastic).
For FRP, those fibers are usually glass, carbon, or other materials. You’ll find that whichever type of panel they use for the ceiling, it’ll be lightweight and resistant to moisture.
This is essential, because condensation can build up easily in RVs , and it can lead to materials rotting or rusting – and also affect the health of the RV’s inhabitants.
In fact, mold is a big problem in RVs, and if you ever spot any on your interior paneling then it needs to be replaced quickly. But where to buy RV paneling?
We’ve got the answers! In our handy guide below, we’ve got essential information on where to buy RV paneling – for the ceiling or interior walls.
Whether your panels have got ruined by mold or rot, or perhaps you’ve damaged one and want to replace it, you’ll be able to find new RV panels with the help of our guide . Read on to know that amazing options on where to buy RV paneling!

Where To Buy RV Paneling? (Ceiling Panels And Wall Panels)
When it comes to knowing where to buy RV paneling, whether it’s for your RV’s ceiling or its interior walls, then there are three key places you can look.
Your Local Hardware Store
Your hardware store is going to be a terrific place to look for some new RV paneling.
These are great places on where to buy RV paneling and all your DIY needs, and they sell plenty of household hardware that will help you to do your home up.
By that basis, they’ll help you renovate your RV too, since it’s simply a home on wheels!
In terms of what they’re likely to sell, you should be able to find MDF boards or FRP boards to use on the ceiling.
Meanwhile, you should also be able to find some plywood that can be used for the wall panels, as well as MDF.
Hardware stores should sell thin plywood, about ⅛ inch thick, which will be good for the job, and it’ll be lightweight too.
In some hardware stores, you might even find that they only sell larger boards than you need.
However, some places will offer the service of cutting the panels down the size you need , allowing you to get exactly what you want.
Your Local Lumber Store
Similarly, your local lumber store is going to be a great place to find the materials you need for your RV’s ceiling or wall panels.
Lumber stores, or lumber yards, are where you can buy all sorts of different types of lumber and wood, allowing you to find exactly the type of wood you might need for your DIY project.
As a result, you should be able to find materials like MDF and plywood at a lumber yard, which will then be ideal for using for your RV interior panels.
Some lumber yards will even have planers, saws, and other handy machines to help you refine your wood to be how you want it to be.
On The Internet
Finally, you can always use the internet to buy your RV paneling. Online shopping is also an answer on where to buy RV paneling.
However, this method has its positives and negatives, and it’s probably best that you try searching your local hardware stores and lumber yards beforehand.
In the event that they don’t have the paneling materials you need, looking online will suffice.
Benefits Of Online Buying
On the positive side , the internet can be really source where to buy RV paneling because it has such a wide range of available materials.
While a store will be limited in what it stocks there, the internet should have a wider range of materials on offer, from all kinds of different places.
On top of that, you might even find that big name hardware stores have websites of their own from which you can search for RV paneling, finding materials that they may not have had in stock in your local physical store.
For example, stores like Lowes and Home Depot have websites that offer an easy online shopping experience.
Downsides Of Online Buying
However, there are downsides to using the internet to source your RV paneling. For one thing, a lot of online retailers will have high shipping rates when sending the materials to you.
This is quite understandable, given that they’ll be shipping large and long boards to you.
However, it can significantly increase the cost of your paneling job, and not everybody will have the budget for those shipping fees.
Additionally, you won’t be seeing the materials until they arrive at your door.
It might sound obvious, but when you go to a hardware store or a lumber yard, you can see each physical board, which allows you to pick out exactly the one you want.
Further still, it allows you to pick out one that isn’t damaged.
While an online retailer should only ever ship materials that are in good condition, this doesn’t always happen, and so you could have a damaged or dented piece of MDF arriving at your door.
You could return it, but by then you’ve already been waiting for it to arrive, and you may not have time to wait longer for new RV paneling.

How Do You Install RV Paneling?
Aside from knowing where to buy RV paneling, you also need to learn how to install them. Whether they’re for the ceiling or the interior walls, it’s time to install them. But how do you do this?
If you’ve never replaced your RV paneling before, you might find yourself confused as to how to install the fresh new materials you’ve just sourced. Thankfully, we’ve got the answers!
Stapling And Nailing
If you take a look at the paneling that your RV already has, you’ll notice that it’s not been put in with too much effort.
A lot of RV paneling will simply be stapled into the walls or onto the support beams that the ceiling has.
In some cases, the manufacturers will have gone one small step further and put putty on top of the staples, covering them up and deterring people from trying to prise them out.
As a result, this means installing new RV panels yourself will be a similarly simple job! You can attach your ceiling panels or wall panels to the RV with nails or staples.
Make sure that you’re careful when using these sharp tools, and also make sure that each of them is securely put in. After all, you don’t want the panels falling off, especially the ones on the ceiling.
After that, it’s a good idea to cover the staples or nails with putty yourself, because it’ll make your RV look a lot more presentable.
If staples are visible all along the ceiling and walls, it might look ramshackle.
If you’re planning to cover the RV’s pre-existing wood paneling with some decorative wallpaper, or perhaps you’ve got some fancy vinyl covering, then you can install these in much the same way – by stapling or nailing them into the studs.
Cutting It To Fit
Of course, the installation job isn’t going to be entirely plain-sailing, because you’ll need to cut some parts of the paneling in order to get it to fit.
For example, when you’re doing the wall paneling, you’ll need to cut it so that it goes around where all your cabinets and windows are.
Similarly, you might need to cut the ceiling panels so that they go around light fixtures and so on.
However, when cutting your RV paneling to fit, make sure that you don’t cut into any pipes or electrical wires that are in the walls or ceiling.
This would be dangerous – and would also damage your RV. As a result, be very careful when cutting your paneling, and be careful when you install it as well.
Are There Studs In RV Ceilings And Walls?
An important factor to take note of when installing your RV panels is the studs of the ceilings and walls.
If you’ve ever done DIY at home, you might be aware of studs, which are special framing members that go inside things like walls.
These studs can either help to bear the structural loads, or they can be non load-bearing.
Studs are also present in the walls and ceilings of your RV. The inner walls should have wooden studs, while the outer walls might have steel or aluminum studs instead.
Meanwhile, the studs in the ceiling will typically be made of wood, though you might occasionally find that they’re made of steel instead.
It’s important to keep the position of these studs in mind when you’re attaching the new RV paneling, and you should staple or nail them to the studs (or other ceiling supports).

How Do You Make Your RV Paneling Look Better?
Once you’ve installed your RV paneling, you might think that it could look a lot better.
While RV paneling will look perfectly fine on its own, in a functional way, it’s not going to be the most stylish addition to your RV.
Since you’ll probably want to spruce up the interior of your RV, as you’ll be spending a lot of time in there, it’s a good idea to give the new panels a makeover.
There are three different ways you can do this: wallpaper, paint, and vinyl.
Wallpaper is a great and easy way to liven up your RV paneling, allowing you to easily apply all sorts of colors and designs to the wall with minimal effort.
You can get wallpapers in practically any variety you want, with wallpaper available in every color, and with plenty of different designs on offer too.
Better still, you could even get a wallpaper that’s a bit more customized – for example, you could have one with artwork from a favorite TV show.
On the other hand, you can get wallpapers which have patterns on them that make them look like other types of wall.
For example, you can buy wallpaper that has brick patterns on it, or you can get wallpaper that looks like a different kind of wood panel.
These are a great way to make the inside of your RV look even classier, as if it’s got real brick walls inside it, and it adds an illusion of texture to the inside space too.
The possibilities are endless, and it takes little effort to paste the wallpaper over your paneling.
Painting your RV paneling will take a little more effort, but is worth all the extra time and energy.
Just as you would paint a wall in a house in order to liven a room up, you can paint the panels inside your RV in order to make the space more vibrant and exciting.
There’s room for plenty of customization too, because you can choose exactly the color (or colors!) you want to use, allowing you to make the inside of your RV a personal reflection of your tastes.
It’s likely a better idea to paint your panels before you install them. If you’re painting them after you’ve installed them, you could get paint splashes all over the rest of your RV.
Of course, you should put down some drop cloths and other covers on the floor, cabinets, and so on in order to protect them from the paint.
However, this does take extra effort, so it’s easier to just paint the panels before you install them!
Finally, you can cover your RV paneling in vinyl. This will be easy to apply, just like wallpaper, and it takes a lot less effort than painting.
Better still, you can get all kinds of exciting designs and colors that will definitely make your RV’s interior space stylish.
Whatever color you want, and whatever design takes your fancy, you should be able to find some vinyl covering that will be easily attached on top of your RV paneling.
Better still, you can even find “3D” vinyl coverings, where they have patterns that stick out from the covering.
For example, you might find one that has various interlocked circles as its pattern, and each of these patterns sticks out from the wall slightly.
This 3D aspect adds real texture and depth to your walls, making your RV’s interior even more exciting and interesting.

Final Thoughts
If your RV’s interior ceiling and wall panels have started to rot, or you just want to replace them, you’ll be able to buy new RV paneling from hardware stores, lumber yards, and the internet.
Attaching these new panels is easy, and you can liven them up by adding wallpaper, paint, or vinyl!
- Recent Posts

- RV or Trailer Pros and Cons: Deciphering the Best Option for Your Adventures - May 2, 2024
- What Should My RV Water Pressure Regulator Be Set At? Explaining Optimum Settings and More - May 1, 2024
- Comprehensive Guide to RV Extended Warranty for Peaceful Journeys - April 30, 2024

Related Posts:

Terms and Conditions - Privacy Policy
RV Paneling 2022 (Guide + Where to Buy)
RVing can be an enjoyable and relaxing pastime, especially if you’re touring the country with your family.
If you’re thinking about adding a bit of beauty to your motor home through RV paneling, read this guide that we prepared for you containing all the information.

What Is RV Paneling?
RV paneling comes in all kinds of styles and colors but usually features the popular wood grain or aluminum finishes. Because it’s a thin, laminated product, it’s ideal for motor homes or trailers where weight is of concern.
The panels are often made from FRP ( Fiberglass Reinforced Plastics ), MDF (medium-density fiberboard), PVC (Polymer Vinyl Chloride), among other lightweight, mold-resistant materials that look gorgeous.
What Kind of Paneling Is Used in RVs?
A motor home is designed to serve as a home on wheels for the owners. Therefore so much time, effort, and research go into fitting RVs with the best materials and systems possible.
Interior RV Paneling
When it comes to the walls of your RV, there are many materials you can choose from. Your budget and lifestyle will influence which one is ideal for you.
Composite plywood
Composite wood is a great option for building purposes because it is strong and composed of many different types of lumber that form a large, thin sheet that you can cut into exclusive shapes.
The interior layers are generally inexpensive wood with a good veneer on top. Composite plywood is tough and doesn’t easily rip or break.
It is, however, vulnerable to water degradation, and if your roof leaks, you may suffer extensive water damage in your motorhome.
MDF (Medium Density Fiberboard)
One of the cost-effectiveness measures that RV manufacturers have resorted to is using MDF (medium-density fiberboard) instead of composite plywood.
Rather than cutting and joining individual sheets of wood, manufacturers glue sawdust together and press it between two evenly placed layers of wood veneer. The end product is then cut to size and form, making it extra light.
Vinyl is the most common paneling material you will see in RVs today. Vinyl has been around for a long time and is quite durable.
You can purchase it from most hardware or home improvement stores in sheets or rolls that measure from 15 mils (thick) to 1 inch (thinnest).
Vinyl is also simple to cut to size; you only need a sharp, retractable multipurpose knife and no extra equipment. The cost of vinyl is less than half that of actual plywood.
If you are looking for durable, long-lasting RV paneling, fiberglass is your best bet. Sure, it’s a bit pricier than other materials, but the adage “you get what you pay for” rings true for RV paneling.
The good thing about fiberglass is that it is water-resistant and durable. It also has the added benefit of being easy to clean. It’s lightweight, meaning that it’s a breeze to install.
A negative of fiberglass is that this material can crack or split if you aren’t careful during installation. If this occurs, it can be very difficult and expensive to fix.

Exterior RV paneling
Exterior RV paneling is important for protecting your rig from the elements. Choosing the right material for your specific environment is an important step in maintaining the aesthetics and durability of your RV throughout its lifetime.
Aluminum RV siding is durable, lightweight, and easy to maintain. You won’t see as many RVs with aluminum exterior paneling as you will with fiberglass. Aluminum paneling tends to be more durable than other materials, but it’s also much easier to dent.
Fiberglass has great durability, is light in weight, and can be molded into different shapes. The material is well-insulated, making it a good choice for those traveling in hot or cold conditions or to areas that experience extreme temperatures. The downside of fiberglass panels is that they are prone to damage by hail, sticks, and sharp objects.
Most metal paneling is a steel alloy and comes in various thicknesses. The outermost layer, or substrate, is typically made of Galvalume steel alloy, a combination of aluminum, zinc, and silicon.
The next layer is the bonder or primer, a type of steel that adheres to the surface and helps inhibit rust.
The top layer of metal RV panels has a clear coating called Kynar 500 or Hylar 5000 that protects the underlying layers from UV rays, corrosion, and other damage.
FRP Paneling
FRP, or fiberglass reinforced plastic, is a strong, durable composite material ideal for waterproof exterior wall panels.
The advantage of FRP panels is that they are easy to clean and maintain and resist mold growth very well. The panels are durable and will not chip or crack easily.
How Thick Is RV Paneling?
The thickness of RV paneling can vary between manufacturers. It is thus difficult to determine the thickness just by looking at the paneling. However, there are some common thicknesses that you will come across.
Most lightweight paneling is 1/8″ thick, heavier sheets are 1/4″ thick. Thinner panels are less durable but easier to install.
How To Install RV Paneling
Installing RV paneling is an easy project that you can complete if you take it step by step. First, you will want to see how much the total cost of a project such as this will be, including the paneling and installation. You can use a professional or DIY.
Things You Need
- Trim and moldings
- 1-by-3-inch furring strips
- Construction adhesive
- Measuring tape
- Nails (both framing and finishing types)
Step 1 – Deciding Where to Install the Paneling
Before you can begin installing the paneling, you must determine where it will be going. The best way to do this is to measure the room area where you are planning on installing the paneling.
Step 2 – Removing Old Paneling
If there is existing paneling in your RV that needs replacing, you will want to remove it before beginning. Use a pry bar to remove the old paneling to remove each piece carefully. In addition, if there is any adhesive on the floor or wall that is holding up your old paneling, make sure you scrape it off before moving on.
Step 3 – Measuring and Cutting Paneling
Start by measuring out the first piece of paneling and cutting it with a utility knife so that it fits into your RV like a glove. Using the nearest piece of paneling, mark out spaces for electrical sockets and switches by measuring the width of electrical outlets. Cut out the window and door sections as well.
Step 4: Attach New Paneling to Cabinet
Next, apply a layer of glue on the back of the paneling and spread it evenly using a trowel. Use a staple gun to staple the paneling in place at 6-inch intervals. Alternatively, you can use wood screws that match the color of your paneling to secure the panels in place
Step 5: Cut Off Excess Panel
After you attach all of your new paneling to the cabinets, you’ll need to use a utility knife or scissors to cut off any excess paneling that extends beyond the edges of the cabinets.
Finally, you can clean up any glue residue left behind from the installation process.
Should You Repair or Replace RV Paneling?
Replacing your RV’s panels is a great way to give it a facelift, make the space feel comfy, and showcase your interior design skills.
Replacing RV paneling can be quite a job, but it becomes much easier to accurately measure the area with a friend so that you don’t have to guess and risk getting it wrong!
Where To Buy RV Paneling
So, if you’re looking for RV paneling and aren’t sure where to start, look no further. We’ve compiled all of the information you’ll need to find the ideal product for you.
Physical Stores
1. winnebago industries, inc.
Winnebago Industries, Inc. is a prominent North American manufacturer of entertaining outdoor products. With various sites in Iowa, Minnesota, Indiana, and Florida, the company manufactures premium RVs and RV paneling, travel trailers, pontoons, fifth-wheel products.
2. Hanwha Azdel
Hanwha Azdel manufactures composite panels with twice the strength and half the weight of wood. The panels also insulate better than wood. They do not rot, absorb water or provide a home for insects. If you have an older motorhome made with wood materials, consider replacing them with Azdel panels.
3. Thor Motor Coach
Thor Motor Coach is one of North America’s largest Class A and Class C motorhome manufacturers and manufacturers. The company builds various models and brands, including the Axis, Challenger, Compass, Four Winds, Hurricane and Tuscany. They are well known for their quality craftsmanship and attention to detail.
Jayco has a range of RV paneling options, such as its Alumalite™ paneling, which combines an aluminum surface with a polyethylene core for strength and durability. The company also offers a range of PVC products like its Sterling™ vinyl wall paneling, which is available in 19 different colors to match your décor needs.
5. Camper Parts World
Camper Parts World seems to be one of the top stores for RV paneling. They have been in business since 2004, and they have considerable experience in RVs. The store offers a wide range of parts and accessories for RVs. Prices are quite affordable, as well.
Online stores
The following are some large online retailers offering online shopping but are an excellent place to start:
How much does RV paneling cost?
How much does RV paneling cost? The price of the panels will depend on the type, the size, where you purchase them, and the company you purchase them from. On average, plan on spending around $30 to $45 per sheet for materials. To get low-cost RV paneling materials, try comparing prices here and here .
Related Posts

Should I Disconnect My RV Battery When Plugged In?

Top 10 RV Parks Near the Amarillo, TX Area

Top 10 RV Parks when Visiting the Port Aransas, TX Area

8 Top Recommended RV Water Pumps + Buying Guide
Leave a reply cancel reply.
This site uses Akismet to reduce spam. Learn how your comment data is processed .
RV Wall Panel Replacement – An 11 Step Guide

There are any number of reasons why an RV wall panel replacement might be needed.
I’ve drawn on my 30+ years in the construction industry and experience removing and refitting a couple of these panels to put together this 11 step guide.
The guide will list the tools and materials needed along with instructions on how to remove and refit a damaged RV panel.
Tools You Will Need

Metal ruler
Pilot Drill
Circular Saw (Optional)
A Word on Tools
All the tools listed here are all pretty straight forward items, and if you don’t have them they are easily available or “borrow-able”.
You don’t need a metal ruler but from experience a ruler like this is much better than a tape at getting very accurate measurements should you need to – sockets etc.
A rebater is a small drill attachment that makes the shape of the underside of a screw head. This enables the screw head to fit flush with the board.
Materials You Will Need
⅛ or ¼ Inch Plywood
Wood Filler (optional)
Melamine Edging Tape (optional)
Plastic Corner Trim (optional)
Wall Covering Of Your Choice.
A Word On Materials
You won’t know what thickness of plywood you will need until you have the old panel off, but generally the plywood used in RV’s and travel trailers will be either ⅛ or ¼ inch in thickness.
Ordinary plywood will do the job just fine, but personally, I like to use marine plywood. Marine plywood is resin bonded, impact resistant and in general much stronger. It’s a little more expensive, so the decision is yours.
Any decent hardware store will carry melamine edging tape. This is installed over any joints you may have to give you that pro finish.
Again, a good hardware store will have a selection of plastic corner trims in various colors. This will finish any rough corners that you may have.
Depending on which RV wall panel replacement you are attempting, there may be fixtures and fittings that need to be removed.
Disconnect any electrical sockets and remove them. (make sure power is off).
Remove any shelves and or fittings.
Next remove any corner trims or joint trims. These trims are more often than not glued on, and will sometimes come off in one piece. An old chisel is a good tool to pry them off.
Sometimes these wall panels will have a bead of silicone in the corners or where they meet the floor. Run a sharp utility blade through any silicone to break the seal.
Ok, now it’s time to remove the panel. Don’t go mad with the pry bar at this stage, RV walls aren’t as robust as the walls in your house. Try to get the pry bar under a section of the panel and gently, little by little pry the panel off the studs underneath.
The “studs” are the uprights the board is fixed to. Depending on your RV or camper trailer these studs will be made of either timber or aluminium. If the studs are aluminium then the panel will more than likely screwed or glued to the stud.
If the panel is screwed (timber or aluminium) it’s going to need a fair bit of force to get the panel off. Try to get the panel off with as little damage to the studs as possible.
If the studs are timber then usually the panel is fixed with a pneumatic staple or pin gun and the panel should come off relatively easily.
Hopefully you should now have the panel off. What you should now see is the wall studwork and probably some insulation.
Depending on the reason for removing the wall panel i.e. water damage, this is the stage where you may have to replace some of the insulation with new.
The insulation is easy to find and your local hardware store will have what you need.
This is also the time to remove any silicone from the corners or floor. A window scraping blade is good for this task.
Now it’s time to cut your new plywood to size.
If you have corner or top trims you will have a little leeway in your measurements. Try to measure for a snug fit but give yourself some wiggle room. Remember that a bead of silicone will hide a multitude of sins!
Remember to measure and allow for sockets and any pipework etc.
Go ahead and cut your board. You can use a circular saw for speed (if you have one) but ¼ or ⅛ inch plywood is pretty easy to cut with an ordinary handsaw. A jigsaw is definitely the best tool for cutting out any sockets.
Go for a trial fit of your new wall panel. Make any adjustments or re-cuts until you are happy with the fit.
When you are happy with the fit, run around the cut edges with some sandpaper to tidy up any splinters and rough edges.
Now it’s time to mark the position of the studs. Use a pencil to mark a line on the floor and ceiling marking the center of the exposed studs.
This is so when the new plywood goes in place you can draw a pencil line on the plywood between the two marks. The line will indicate the center of the studs where you can screw the board to the stud.
Install your new panel.
Put your new panel in place, double checking that you are still happy with the fit.
Once the panel is in place, find the pencil marks you made marking the top and bottom of the studs in Step 7. Holding the panel in position hold a level or straight edge between these two marks and draw a pencil line. This will mark the center of the studs behind the plywood.
Now it’s time to screw the panel in place. Using the pencil line you drew on the plywood as a guide, use a pilot drill (smaller than your screw thread size) and drill pilot holes every 8-10 inches along your lines.
After you have your pilot holes, use the rebater and make your chamfered holes in the pilot holes.
Now screw your panel to the studs.
Now is the time to apply whatever wall covering you have decided on.
Before the wall covering/paint goes on it may be necessary to fill the screw heads with a little wood filler and rub them down flush.
You might be going for a painted finish, or one of the sticky backed plastic designs available.
Whatever finish you have decided on, complete this before moving on to the next step.
Ok, so now it’s time for the finishing touches.
If you have any joins you can use melamine edging tape to cover them. Using this tape really does give a professional finish.
If you need to cover any corners use plastic corner trim to finish them.
Depending on where your new panel is situated, run a bead of silicone (whichever color suits best) around the bottom/sides/top of the panel to finish off.
Hopefully you found this guide helpful.
If you did, please check out my other RV maintenance guides .

Leave a Comment Cancel reply
Save my name, email, and website in this browser for the next time I comment.

We are a participant in the Amazon Services LLC Associates Program
© Rovin RV 2023
Where You Make It
Best Tips For Replacing RV Wall Paneling
Hey! This site is reader-supported and we earn commissions if you purchase products from retailers after clicking on a link from our site.
Do you need to repair or replace your interior RV wall paneling and aren’t sure where to start?
Whether you’re ready to upgrade the look of your RV interior or need to fix water or other damage to the wall panels, this guide will take you through the entire process.
Inside, you’ll get the details on what material RV manufacturers use for walls, how they attach, and tips for removing and replacing RV wall paneling. You’ll also find answers to RV wall paneling FAQs.
When you follow this guide, you can fix your RV wall panels successfully and get back to camping!
Common RV Paneling Material
RV manufacturers use the following wall paneling in travel trailers, fifth wheels, and motorhomes.
Azdel is a composite material made from blending fiberglass and polypropylene. Azdel is most common in four-season travel trailers because it offers better moisture resistance and insulating qualities.
Other benefits of Azdel versus wood products include:
- High strength
- Lightweight
- Emits no odor
- Environmentally-friendly
- Buffers vibration and sound
You can choose to replace RV wall panels with Adzel, which you can find through RV supply stores.
Vinyl wall panels are more common for exterior RV applications, but you can find some products in 4′ x 8′ sheets for interior use at some home improvement stores. This is the very same material that vinyl records are made of.
The biggest benefits of vinyl are that the material is 100 percent waterproof and lightweight. However, the material isn’t durable over time, as it dries out and can crack from bumps and vibrations during travel.
Plywood panels were standard in older RVs but are rare in modern campers due to the weight and water damage, mold, or rot if your RV leaks and due to harder maintenance of RV moisture control .
The benefits of using plywood are its strength and rigidity. Plus, it allows you to hang lots of decorative items anywhere you like on your RV walls.
HDF (High-Density Fiberboard)
HDF is possibly the most common material recreational vehicle manufacturers use to panel RV interiors.
The 1/8th-inch-thick panels are strong and thin, making them ideal for RV travel stress and resist water better than wood or MDF.
The panel surface is bonded with decorative vinyl coating, so it needs no further treatment once you install it.
Most major RV brands sell HDF replacement RV wall panels to match their most popular models, which is something to look into if you want to avoid a mismatched interior.
When buying any new RV paneling, don’t forget to purchase thin trim strips to cover the seams between each panel.
How RV Panels Attach to Walls
RV wall panels attach to the camper’s wood framing using small staples or brad nails.
For thicker plywood, it’s more likely that the manufacturer will use a mid-size nail or screw to attach the wall panels securely.
You should also expect to find an adhesive between each stud and the back of the paneling, which increases the strength of the entire wall and decreases movement.
After all the RV wall paneling is in place, the manufacturer covers each joint vertically with a long thin strip of matching material, using a fastener every two feet or so. This strip covers all the fasteners along the edge of each panel and hides gaps between the RV paneling sheets, making the wall look seamless.
How to Remove RV Paneling
Removing RV paneling isn’t as difficult as you may think. The key is not to cut it with a power saw or smash the walls with a hammer as you would if you were removing old drywall in a house.
RV walls are generally 3-inches thick, and plenty of wiring (your RV electrical system ), plumbing, and insulation could be hiding behind the wall panels. Hacking at the walls may lead to expensive damage.
The first step to removing RV wall paneling is taking off outlet covers, lights, door trim, or other surface-mounted items. Next, run a utility knife through any caulk along the panels’ edges, finish strips, and ceiling and floor edges.
You may also need to cut the wall panels along the edges of cabinets or built-in furniture to remove a piece since they are often put in place after the wall paneling is on.
The next step is to take a pry bar, slide it under the finishing strips and the paneling, and gently pull or twist it toward you to loosen the strip from the wall. Work your way along until you pull all the nails or staples out with the strip. You’ll now see the edges of the large wall panel sheets that were hiding underneath the strip.
The final step is to work the pry bar between the stud and panel edge, to lift it off the wood. Once a section is lifted, work up and down along the stud until the panel is loose. Then, move across to the other side of the panel and work that edge free.
Once the sides are done, grab a loose edge and curl it toward you. This action should pop the adhesive and other nails from the middle studs and make the removal of the panel a bit easier.
If the panel is of poor quality or has heavy moisture damage, the material will more likely break off in chunks and will require a bit more work to remove.
Lastly, if you see any nails or staples in the studs after the panel is off, use a nail puller or pliers to remove them.
PRO TIP: Keeping panel pieces whole when you remove them allows you to use them as a template when cutting your replacement panels. Take the time to number or mark each panel and corresponding wall studs to know which panel goes where.
Things to Consider Before Replacing RV Wall Panels
Before you start tearing out the walls in your RV, you need to assess a few things.
First, do the wall panels you want to replace have damage from a water leak or continual banging or scratching from doorknobs, feet, or pets?
Fixing the cause of such problems to your wall paneling needs to be a priority, or you’ll find yourself replacing the paneling again in short order.
Seal any leaks, and replace any wall studs that show signs of damage or rot.
Troubleshoot ways to beef up areas of the wall that get heavy abuse. For example, you may select a thicker RV wall panel material or cover thin paneling with a layer of wood slats or other more durable material over the areas of concern.
Now is also the time to consider moving or adding electrical outlets, lights, or plumbing lines since you’ll have access to these components once the wall panels are off.
Choosing the Best RV Paneling Replacement
While you can opt for an exact wall panel replacement for your RV renovation, you do have the option to use other materials if you think they’ll be more suitable for your needs.
The only two things you must consider before switching to a new RV wall panel material are the overall weight and if any extra thickness will prevent it from fitting correctly around cabinets or furniture or laying flush with existing paneling.
All RVs post a gross vehicle weight rating (GVWR) that includes the items and supplies inside your camper and materials in the build.
If you increase the weight of your walls by a couple of hundred pounds by switching to plywood or MDF, you must lighten your load by that amount elsewhere in the RV.
How to Install RV Panels
Once you have the underlying RV wall studs, wiring, plumbing, and insulation ready for new wall panels, it’s time to start measuring each section and cutting your paneling to fit.
The critical step is to cut each panel (if necessary), so the outer edges fall halfway across a stud. It would be best to mark all studs on the ceiling and floor with painter’s tape so you know where to nail down the paneling for the strongest attachment.
Set up a nailgun with brads or staples, or fill a construction apron with nails or screws. Put a tube of wall panel adhesive into a caulking gun, so you’re ready for action. You’ll also want a carpenter’s level to align the first panel, so the rest falls into place perfectly.
Start along a corner when replacing an entire wall of panels. Run a bead of adhesive over each stud the RV wall paneling replacement will cover.
Don’t forget to pre-cut holes in the paneling for outlets or lights so that you can reinstall those components quickly.
Line up your first wall panel, so the edge is centered and vertically level along with the studs. Then, using a nail gun, hammer, or drill, adhere the paneling to the stud using the appropriate fastener.
Repeat these steps for replacing RV wall paneling until the interior is complete.
Next, cut your thin finishing strips to length and install them over the seams between panels to finish the project. Use adhesive to prevent the strips from popping loose, and place a nail or staple every 12-18 inches.
Once everything is in place, go over any obvious nail holes with a bit of matching spackle and let dry. Now, you’re ready to reinstall any light fixtures, outlet covers, and door trim to complete the project.
The Perfect DIY Project
New RV walls can be a weekend DIY project that will transform the look of your camper, whether you need to fix paneling damage or want to upgrade the interior design.
By using the best tips to replace RV wall panels in this guide, you’ll complete your project fast and get back to enjoying fun camping adventures!
RV Wall Paneling Replacement FAQs
Can i paint interior rv wall panels, can i wallpaper over rv wall panels, what’s the best way to hang things on interior rv walls, is it safe to install tile over rv wall panels, related articles:.

Mike leads research, writes, and keeps the site up and running. He's worked on upgrades to an old class A Winnebago, vans, and other homes - wherever they are.
Leave a comment Cancel reply
Your email address will not be published. Required fields are marked *
Wood Paneling in RVs
A recreation vehicle is just not all about fun. A lot of work is in place to ensure that it does not lose its functionality. It can either be done by professionals or as a DIY project which saves a lot! Recreational vehicles can either be new or older RV construction. It is important to understand how RVs are built. Getting a glimpse of the problems surrounding RVs also helps in knowing what technique to use.
Facts about RV Wood Paneling
• RV wood paneling is thinner than other types of paneling (measures 1/8 inch thick). • 3/16” and 1/4” are thicker versions that are rarely used. • The face layers are made of softwood. This is because they are covered with wallpaper before installation. • Finding an exact wood panel matching a wallpaper can be difficult. Installing Wood Paneling in RVs

Among the many available options for RV, paneling is wood paneling. Once the frames are in position, installing the wood paneling is the next step. Composite plywood is the kind of plywood used in RVs. It comprises different types of wood pressed together. The outcome is a large sheet, where the inner layers are made of cheap wood.
Most recreational vehicle manufacturers use plywood and oriented strand board structural panels for the RVs. The wood paneling is applied to: • Floors • Bed boards • Countertops • Cabinets • Shelving • Doors • Wall lining • Seats • Roof decking • Miscellaneous bracing and decking
The wood paneling is made strong by ensuring the wood grains of the boards used are perpendicular. Other than ensuring it cannot break easily, the wood paneling gives the RV a comfortable and homely vibe.
The walls ooze a natural look and painting, decoration, wallpapers, and hanging decorative items can be done. It is very easy to customize wood paneling. The lightweight wood paneling helps in reducing fuel consumption. Safety in the RV is also contributed by the wood paneling features such as panel strength, impact resistance, and stiffness.
Wood paneling is however faced with one problem. It is vulnerable to water damage where molding and rotting can occur. Precautionary measures are highly recommended to ensure it is not prone to wetness.
Working on Damages on the Wood Paneling in RVs
Solving roof leaks if they are done before paneling. Roof leaks are identified by checking the air conditioning unit, seams, vents, and any other object that pierces the roof such as screws. Wetting the roof is a technique that used to identify areas with water puddles. It is done in cases where the leaks are not visible.
Depending on the place and damage, wood paneling damages in RVs can be replaced or not. Wood paneling that is in hidden places like behind the oven on inside cabinet walls might be left out. The damaged part can be removed and leave it like that. However, if the damage is excessive, it can be covered with door skin. For the wall cabinets, the patch can be cut to the full size of the cabinet. Installing new or replacing visible wood paneling in RVs is a bit more tedious and complicated than the bonding of the structures. It is also contributed by the furnishing therein. Getting quality materials, the right working tools, and insights on how to go about paneling guarantees homely and cozy RV.
One Response to Wood Paneling in RVs
Hello, We are looking to match the paneling that is already in our trailer. We are looking paneling for our cabinets. We have some that is damaged and would like to replace it.
Sincerely A. Pelley
Leave a Reply Cancel reply
Your email address will not be published. Required fields are marked *
- Save my name, email, and website in this browser for the next time I comment.
- Technologies and Innovations
- Tips for woodworkers
- Uncategorized
- Wood panel design
Sales & Showroom
Distribution center.
- [email protected]
Recent Articles

Types of veneers for wood panels
Types of veneers for wood panels When looking for the perfect wood panel coating for your design projects, it’s crucial

What is HPL and Why Choose It?
What is HPL and Why Choose It? HPL, or High-Pressure Laminate, is the perfect solution for those looking for beautiful
Pompano Beach Sales & Showroom
- 2601 Gateway Drive, Suite B Pompano Beach, FL 33069
- (954) 956-7576
- (954) 956-7577
West Florida Coast & Central Florida Sales
- Angel Ruiz: (954) 905-5650
US Central & West Coast Sales
Fort lauderdale distribution center.
- 1309 NW 65th Place Fort Lauderdale, FL 33309
- You are here:
- Home »
- Blog »
- » Luan for RV Guide (Finding 1/8 Inch RV Plywood Paneling)
")
Luan for RV Guide (Finding 1/8 Inch RV Plywood Paneling)
- August 30, 2022 /
- RV Interior RV Siding /
- By James V.
For both the name and the plywood. If you are looking for just luan, it is also called filon. Filon is a different product than luan plywood which is usually made from mahogany. Filon is not as strong as luan plywood and used to be called luan board.
Finding either product is not going to be hard. Some dealers will have luan in stock but it may cost you $100 per sheet. Usually, the home improvement stores will have a large supply and their prices will vary.
To learn more about this standard RV product, just continue to read our article. It has the information you want to know about so you can do your own repairs and get the job done just right.
What Kind Of Plywood Do You Use For RV Walls?

Luan plywood is ideal for this as it is cut very thin. Once you apply it you do not lose any real living space. The 1/8 of an inch thickness goes on quickly and fills many thin spots you need to replace.
The good news is that it is cut and handled like regular plywood. The key is to use the right depth on your circular saw. You do not need to have a lot of the blade showing when you do your cuts.
Also, luan plywood is easy to handle and you can use glue, nails, or screws to secure it in place. That is if you do not have a very thick spot to fill. Other than luan plywood, you can use any type and thickness that plywood comes in.
There is no real limitation for RVs or trailers when it comes to this type of repair material. Wood will work just about anywhere in your RV, etc., especially for walls and floors. It is easy to install and you do not need any special training, tools, or hazardous materials protection.
How Thick is The Plywood On RV Walls?
The actual thickness will depend on the materials used by RV makers as well as their bottom line. Usually, they are not going to be very thick and if you get a 1/4 inch plywood on your walls, consider yourself lucky.
Sometimes, the plywood used to make the walls will be as little as 1/8 of an inch or even 9/64ths of an inch. The materials used to build those walls can be luan plywood, composite plywood or MDF, and vinyl. It is all up to the discretion of the RV maker.
More expensive RVs, etc., may have thicker walls but then you are paying a higher price for that added thickness. But do not worry, you are not stuck with those materials if you have the money to replace them
Unfortunately, the stud work is not that great either and you only have about 2 inches or less to work with when you start nailing in your replacement plywood. The studs are not like house studs and may not be that strong either.
What Size Plywood is Used For The Camper Floor?

The first thing that has to be mentioned is that plywood usually comes in 4 by 8 pieces. You can get 4 by 4 or 2 by 4 sections but your costs may go up some. But if you do not want left over plywood, then buying a mixture of those options will help you use up all the wood.
Generally, you are looking at having 1/4 or 1/2 inch thickness on your floors. This does not offer a lot of protection or stability when you walk on it. These thicknesses are strong but you can always do better.
If you have the headroom, nothing is stopping you from pulling up the vinyl or carpet flooring and adding either another 1/2 inch piece or moving up to 3/4 “ thick plywood.
Going thicker will protect your sub flooring from water damage when you have bad leaks. If you want to know the ideal thickness, then you should upgrade to 3/4 inch thickness or 1 1/2 inch thickness.
You may lose a little headroom but after installation, you will have a great floor. Then to avoid squeaks, add some glue to the joists to make that floor solid when you crew it into place.
Best Plywood For RV Floor
You have a lot of choices and the composite, MDF, and vinyl options are not listed in the top best lists. To get the best, you should go for marine-grade plywood. This is material used for boats and other marine applications.
This plywood option is made using waterproof glue and is designed to resist rot, decay, and termites and other insects. The next best flooring material would be any one of the hardwoods.
These hardwood options are baltic birch, oak, poplar, walnut, and maple. Plus, you can’t go wrong with treated plywood as it does the same job as marine grade except it may not be made with waterproof glue.
There are different styles of plywood as well. Tongue in groove hides all the seems and helps the wood join together easily. Then, you should watch the grade of the wood. There are A, B, C, & D grades with A being the best and D the not so best.
You will pay more for the top grades and also, you can get these grades in 3-ply or 5-ply options as well as multi-ply. There is a lot to think about when it comes to replacing the flooring in your RV or trailer.
For more information read our article at this link .
Luan Paneling For RV

Paneling is a bit different from the material you place on the studs in your RV walls. Luan plywood is good for the underneath portion but it will not look good unless you add vinyl, paneling, or some other exterior product.
When it comes to paneling, you have lots of options. It will all depend on how you want your RV to look on the inside. If you want a spacious interior, you need to go light. If you don’t then you need to go with a darker paneling color.
There are lots of designs to choose from so you have to spend some time looking at different paneling. Pick the one that pleases your eyes the most. Keep in mind that almost all wall paneling is sold in 4 by 8 sheets. You may end up with some large sheets left over.
To get more of an idea about paneling, see our article on this topic a t this link . If you want to keep the bugs away, go with a cedar-made paneling product.
How Thick is RV Luan?
The two most common sizes you can buy luan plywood in, are 1/4 inch and 1/8 inch. There may be other thicknesses but these are the two standard sizes. Any thinner and you will have very weak wood that won’t take a lot of effort to break.
You do have other options when it comes to plywood. It will all depend on how much space you want to give up. Another 1/4 inch thickness should not be too bad and if you can find luan in 1/2 inch pieces then go for that size. It may be more expensive but the thicker the wood, the more security and stability you will have.
Or you can go with a nice soft pine or fir plywood. These work well and are a lot stronger than the word soft implies. They may also be a bit cheaper than luan plywood as that type of wood has to be imported.
The hardwood trees used to produce this wood are found in Southeast Asia including the Philippines. There are now other countries' trees that are being used but they are not found in the western world.
1/8 Inch Plywood Paneling

This is not going to be hard to find. These sheets are on sale just about everywhere paneling is sold. That includes the big box home improvement stores.
Home Depot, Lowes, and similar outlets will have a large array of 1/8 inch paneling and it will all be made of different wood materials. Plus, you should check out your local home improvement stores (non-national or international chains) to see what selection they have and the price they are selling it at.
The hard part of your search will be filtering out all the great colors, designs, and styles. Prices will vary depending on the region of the country you are living in and the store you decide to shop at.
Also, hardwood paneling usually is more expensive than softwood as the latter is easier to get and to make into the paneling. Plus, you do not have to stick with 1.8-inch paneling. If you want you can move up to 1/4 inch thickness. Those are found at the same retailers. You can make your choice when you get to the store.
RV Ceiling Panels Home Depot
There is usually a good selection at this retail outlet. Making sure you have a good selection of materials to buy is the heart of their business. The price will depend on the type of ceiling panels you buy.
The same wood available for your walls and floors is available for your ceilings as well. But since the roof leaks more than your plumbing, you may want to consider treated wood or marine grade plywood.
Those two types are designed to resist water with the latter using waterproof glue. That is a bonus and helps keep any water damage to a minimum. Or to keep the weight down, you can go with FRP or PVC ceiling panels.
These are lighter than other plywood materials, are already water-resistant, and come in a white color so they do not need paint. There is also MDF with wallpaper already placed on it.
This wood is okay, but its value depends on who uses it and if they like it or not. To find these panels, as well as wall and flooring panels, you can go to your local lumberyard and see what prices they are selling at.
1/8 Door Skin Plywood

This is generally the material you will find on both sides of a hollow core door. It does its job of providing privacy but it is not very strong. It should be cheaper than other plywood materials. If you are looking for longevity, durability & strength, then this is not the material you want to use.
It is okay and does a good job, but it will not be of any help if you are in an accident. To offset that lack, you can get these door skins in hardwood plywood but their availability will be up to the retailer selling the paneling and door skins.
To buy any of these options we have discussed here, you can go directly to your big box home improvement store or lumberyards. Or you can try shopping online and see if those prices are cheaper.
The online stores have less overhead than the physical warehouses. You may be able to buy more for the same price elsewhere. There are always recycling places as some people do recycle old wood when it is in top condition.
Check around as you may find a close-out store with a load of luan or other plywood they want to get rid of.
Some Final Words
Luan on for RVs is plentiful. You just have to pick the right outlet to make your purchase. As the thickness grows so does the price. So shop around for the best price and make your selection.
The same goes for interior wood paneling. There are a lot of places where you can get great colors and designs for a reasonable price. Just make sure to get the best grade your budget can afford. The top grades are superior to the lower ones.
Related Posts
Toy Hauler Add a Room Options (DIY Ramp Tent, Dometic Room)
DIY RV Engine Cover Console Replacement Ideas (Insulation)
RV Cable Pass Through Guide (Electrical, TV, Through Wall)
Leave a Comment:

- Resource Library
Special until September 30th: 20% off Git-Rot (all sizes). Use Code SEPT24 at checkout. *restrictions apply
Free ground shipping in the Continental US for any orders over $150!
RV Interior Paneling Repair Tips...
Rv interior paneling repair tips.

Nothing will upset the look and comfort of your RV interior more than damage to your RV’s paneling. This kind of damage can lead to challenges like mold and rotting, and it can look unsightly, rendering the entire RV unusable for camping, traveling, and hosting. Want to know how to get your paneling back into shape in a hurry? Then follow our RV interior paneling repair tips below!
Start By Inspecting For Water Damage
If you have water damage in your interior paneling, there’s a good chance that simply repairing your panels will not do the trick. A leak will ensure that your paneling will continue to suffer damage every time there’s precipitation.
That’s why it’s so vital to start with an inspection to check for leaks. Look at both the inside and outside of your RV. When it rains, make sure that you’re especially sensitive to any moisture making its way in. We offer plenty of RV sealants to deal with exterior leaks at the source—but it won’t do any good until you’ve identified the problem.
Use The Right Materials
Albert Einstein once said that if he had an hour to fix a problem, he would use the first 59 minutes to diagnose the problem. Finding the right materials for this repair job is similar: when you do a proper diagnosis of your RV interior paneling repair issues, you can easily match the materials you’ll need.
- Git Rot® Kit . If the paneling suffers from dry rot, make sure that you seal off any potential leaks and then repair the affected area with this two-part liquid epoxy formula. Using capillary action to penetrate and restore wood, this can bring new life to paneling that’s starting to weaken.
- Silicone Rubber Sealant . By adhering safely to wood, a silicone rubber sealant can help repair any leaks in the paneling itself. And with a full cure within 24 hours, this sealant will dry out quickly enough to get your RV back to working condition.
Consider Replacing If Damage Is Too Extensive
All that talk about diagnosis is vital, because it could save you both headaches and money. How? If your damage is too extensive, you might need to opt for a professional repair right off the bat. That will save you a few trips to the hardware store as well as some headaches down the line. But that doesn’t mean you should throw your hands up and declare a repair impossible without taking the time to understand it!
If you do your research and take the time to understand the damage in your RV interior paneling, you may be able to handle the job with ease on your own. And with the right RV products in your corner, you can safely address the problem and get your RV back on the road in no time.
Share this:
- Click to share on Twitter (Opens in new window)
- Click to share on Facebook (Opens in new window)
Related Blogs
Thanksgiving trivia.
Thanksgiving is one of America’s oldest and most loved holidays. Even though the story is steeped in a dark history […]
Rv’ing With Your Pets
Today, more than ever, people are traveling with their pets and including them in all activities. Pet Travel Center reports […]
The Ultimate Camping Bucket List
When you think campgrounds, KOA probably comes to mind as you can find KOA’s all over the United States. Well, […]
All products proudly made in the usa
Discover more from rv by life.
Subscribe now to keep reading and get access to the full archive.
Type your email…
Continue reading


From floor-to-ceiling, front-to-back, our product line has you covered
Robert Weed has been designing, manufacturing and supplying components to the RV industry for decades. Whether it be countertops, molding, walls, cabinets or anything else you can think of, our top-quality products, unmatched customer service and vast production capacity make Robert Weed one of the premier industry partners. With our industry-leading processes and supply chain management, we’re able to meet your needs in the most cost-efficient way. Check out our product lines.
RV Products

Laminated Panels
High pressure laminate perfect for decorative applications in Recreational Vehicles and suitable for interior wall and ceiling panels.

Wrapped Products
Including wrapped battens, stiles and moldings, all manufactured for decorative applications and suitable for interior trims.

Cold Press Products
Manufactured for countertop, divider walls, wall panels applications in Recreational Vehicles and trailers.

RTF Products
Ideal for a multitude of uses in both Recreational Vehicles and homes, including countertop, worktop, stands, doors, backsplashes and table applications.

Cabinet Components
Cabinet component manufacturing available for storage and instant drawer construction applications in homes and Recreational Vehicles.

Slide-out Floors
Western fir plywood cut to exact specifications and machined to fit individual mechanical motors, our slide-out floors are an excellent platform to build an RV slide out unit.

Composite Materials
Azdel composite panels are a composite blend that creates a strong, lightweight, quiet, weather and temperature resistant, odorless and environmentally friendly wall that increases the life of an RV, reduces fuel costs and produces a quieter ride.

Raw Materials
Raw materials including Meranti plywood, melamine panels, and particle board distributors. Materials you need delivered when you need them.

The video and article series below shares insights into how we can help your organization gain efficiency while forecasting your needs in the future.

DiSC to Solve Industry Challenges

Supply Chain in the RV Industry

Using the Supply Chain to Improve Pricing Volatility, Quality and Core Competencies

Supply Chain Management—A Discipline in Reducing Risk
Expertise in many industries.
Our products and on-site experts also allow us to provide the right recommendations and products to a wide-variety of industries where quality and customer service matter.

Contact Us to learn how we can meet your specific needs.


Azdel Onboard® Composite
Azdel Onboard composite panels have been used in RV exterior and interior sidewall, ceilings, and more since 2006. They are produced using a patented blend of polypropylene and fiberglass to create a strong, lightweight, quiet, weather and temperature resistant, odorless and environmentally friendly wall that will increase the life of your RV.
With over three times the insulation value, excellent strength, superior sound reduction, and half the weight of wood, our composite material increases durability, comfort and lightens your adventure. The reduced weight helps keep fuel costs down, and the interior noise reduction helps provide a quieter and more peaceful stay.

The composite panel that’s changing everything
Azdel Onboard composite panels are used in place of lauan plywood during your RV wall’s construction. They are produced using a patented blend of polypropylene and fiberglass to create a technologically superior wall that will extend the life of your RV. Check out the benefits!

Plywood RV Panels
The quality of T-PLY Plywood designed for RV Manufacturing

Premium RVs require premium materials.
Because your RV is exposed to all kinds of weather, from humidity to extreme heat and cold, you need panels that will last through it all. When it comes to finding RV panels that match the quality you need for your RV, you can trust the Tolko name and our commitment to our customers.
Consistent quality
RV manufacturers prefer T-PLY plywood products for their superior surfaces and their consistent cores, which offer enhanced fastener holding strength. These panels provide precision, high-grade strength in an industry with limited capacity for deviation or adjustments.

T-PLY Pro Premium Select Square Edge | CCPTS Application: Laminating Substrates, Underlayment
Profile: Square Edge Sanding: None Face: Premium Select Grade Inner Plies: C grade or better

T-PLY Pro T&G Subfloor | CDPTS Application: RV Underlayment
Profile: Tongue & Groove or Square Edge Sanding: Touch-Sanded Face: Select Grade Inner Plies: C grade or better

More RV and Cargo Trailer Products
Tolko offers a variety of strand and veneer products suitable for RV and Cargo trailer construction.
Tolko's Plywood Products
More tolko products.

INDUSTRIALS

CALL OUR PLYWOOD SALES TEAM TO ASK ABOUT RV PANELS.

Please share your location to continue.
Check our help guide for more info.

- Leadership Team
- Crane Commitment
- FRP History + Innovations
- COOLING TOWER
- General Purpose
- SEQUENTIA CORRUGATED
- SEQUENTIA FLAT
- Assembled Panels
- Seam Treatment Accessories
- Adhesive + Installation Tools
- Exterior Sidewall Panels
- Interior Panels
- Roof Panels
- Restaurants
- Food Processing
- Hospitality
- Grow Room Wall Panels
- Daylighting Solutions
- Industrial Structures
- Greenhouse Panels
- Cooling Tower Panels
- Curtain Wall Solutions
- Interior Liners
- Translucent Roofs Panels
- Reefer Roof Panels
- Scuff Plate Panels
- Aerodynamic Side Skirts
- Classic Collection
- Forest Collection
- Heartland Collection
- Runway Collection
- City Works Collection
- Pathways Collection
- Custom Program
- Engineered Solutions Panels
- Installation Information
- Photo Gallery
- Care + Maintenance
- Repair + Maintenance
- All Products
- Order FRP Samples
- Technical Data Sheets
- Test Reports
- Safety Data Sheets
- Ordering Information
- Short Shipment Claim
- Request RGA
- Non-Warranty Claim
- Building Products Warranty
- RV Warranty Information
- Transportation Warranty Information
- Satisfaction Survey
- Building Materials Distributor Locator
- Retail Dealer Locator
- Engineered Solutions Materials
- Recreational Vehicle Materials
- Transportation Materials for Aftermarket
- Architectural Rep Locator
- Commercial Building Products Sales Locator
- Engineered Solutions Products Sales Locator
- Recreational Vehicles Product Sales Locator
- Transportation Products Sales Locator
- International Area Sales Locator
- Latin America
- Middle East
VARIETEX & DESIGNS DECORATIVE PANELS
Crane Composites interior frp sidewalls are moisture resistant and easy to clean. They are superior in both appearance and durability versus any other type of product with over 100 different colors, finishes, and patterns.
Resilient textured and colored wall panels in over 35 colors and 5 finishes.
Imaged pattern wall panels available in 60 options with endless custom opportunities available., privacy overview.
G-Lite™ Panels
Engineered plywood for lightweight applications.

G-Lite plywood is a lightweight, sustainably engineered line of plywood products designed specifically for RV interior applications, including cabinet faces, cabinet components, furniture and structural elements.
Made possible through a collaborative partnership with Garnica, a premier European plywood manufacturer, G-Lite plywood panels are available exclusively from Genesis Products.
- Engineered for RVs Designed for the unique needs of RV interiors
- High style, less weight Save weight without sacrificing strength or style
- Shop by application Four product lines to meet specific requirements
High quality
G-Lite is manufactured using the latest plywood technology paired with over thirty years of plywood knowledge and expertise.
Lightweight
Made with 100% poplar core, G-Lite is 30% lighter than other commonly sourced RV panel substrates.
Sustainable
Sourced from fast-growing European plantations and sustainably managed forests for a stable, reliable supply chain.
30% Lighter
compared to common RV panel substrates
sustainably forested poplar from European plantations
G-Lite Core
Engineered for cabinet and furniture applications.
G-Lite Core is a lightweight plywood with exceptional surface quality to provide a consistent, uniform finish. Available in 8 ft. and 9 ft. length.
Applications Tables, Shelving, Cabinets
Thickness 9mm, 12mm, 15mm
G-Lite Face
Designed specifically for cabinet face frames.
G-Lite Face provides a lightweight, ultra-smooth lamination surface with superior screw retention. Available in 8 ft. and 9 ft. length.
Applications Cabinet face frames
Thickness 15mm, 18mm
G-Lite Base
Manufactured for lightweight, structural applications.
G-Lite Base is constructed of 100% poplar for strength without the weight. Available in 8 ft. length.
Applications Furniture + wall framing, Flooring + roofing
Thickness 3mm, 5mm, 9mm, 12mm, 15mm, 18mm
G-Lite Luxe
Constructed for luxury coaches.
G-Lite Luxe utilizes decorative hardwood faces such as birch, cherry, walnut, oak, and maple for an exceptional finish. Available in 8 ft. length.
Applications Cabinetry, Finished accessories
Thickness 5mm, 9mm, 12mm, 15mm, 18mm
IMAGES
VIDEO
COMMENTS
The Hardware Or Lumber Store. 1/8 inch plywood, utility paneling, or MDF boards from your local hardware store is perfect for replacement RV wall paneling. For RV ceilings, you can normally find some FRP board at hardware stores as well. Hardware stores are a fantastic place to get RV paneling because they often have larger board sizes and some ...
This usually isn't found until visible areas become damaged, but under further investigation, a larger hidden damaged area is encountered. RV paneling is thinner than home paneling, usually only 1/8 inch thick. Like most paneling, it is a three-ply plywood product consisting of a thicker core with two veneer faces.
Some companies you can check out are Hanwha Azdel, Australian Laminators, and Alibaba has a list of Chinese paneling makers while selling their products. You can also check with RV manufacturers themselves starting with Winnebago, Thor Motor Coach, and Jayco. Other manufacturers include Keystone, Tiffin, American Coach, Coachman and Starcraft.
RV Paneling Batten Strips Carlo Fawn/ York Natural. $9.95. RV Paneling Seam Tape Adobe Arctic White 1"W x 60'L. $25.00. Add To Cart. RV Paneling Seam Tape Carlo Fawn / York Natural 1"W x 25'L. $19.95. Add To Cart. While aluminum siding and fiberglass siding have their pros and cons, they have become the two main types of RV paneling.
This paneling is excellent for repairs and upgrading the interior of your RV. When you're ready to build up your wall (s) order some sleek and sturdy paneling from RecPro. Details: Dimensions - 4' W. Dimensions - 8' L. Dimensions - 1/4" T. Lightweight. Solid surface. Easy to install.
In most cases, RV wall paneling will be joined to wall studs. The wall stud will have a plastic track in the center to receive another cap for the joint. These caps simply press into the track fastened to the stud. To remove them, start a corner with a flat screwdriver or thin pry and peel the cap from the track.
If your RV's interior ceiling and wall panels have started to rot, or you just want to replace them, you'll be able to buy new RV paneling from hardware stores, lumber yards, and the internet. Attaching these new panels is easy, and you can liven them up by adding wallpaper, paint, or vinyl! Author. Recent Posts.
Installing RV paneling will depend a lot on the construction material the panel is made of. For vinyl and fiberglass, glue is the best adhesive to use to make sure they finished product looks good. When you are using wood paneling, finishing nails or good staples using a pneumatic nailing or stapling gun.
Step 4: Attach New Paneling to Cabinet. Next, apply a layer of glue on the back of the paneling and spread it evenly using a trowel. Use a staple gun to staple the paneling in place at 6-inch intervals. Alternatively, you can use wood screws that match the color of your paneling to secure the panels in place.
Step 9. Now it's time to screw the panel in place. Using the pencil line you drew on the plywood as a guide, use a pilot drill (smaller than your screw thread size) and drill pilot holes every 8-10 inches along your lines. After you have your pilot holes, use the rebater and make your chamfered holes in the pilot holes.
Vinyl paneling is another popular option for RV interior wall paneling. It is durable, waterproof, and easy to clean. It also comes in a variety of colors and designs, so you can customize your RV's look and feel. However, vinyl paneling is more expensive than wood paneling and can be susceptible to damage from UV light.
Repeat these steps for replacing RV wall paneling until the interior is complete. Next, cut your thin finishing strips to length and install them over the seams between panels to finish the project. Use adhesive to prevent the strips from popping loose, and place a nail or staple every 12-18 inches.
An easy DIY for your RV renovation project, installing wood panels on the wall changed the whole vibe of the space! We've used the camper since the install a...
Facts about RV Wood Paneling. • RV wood paneling is thinner than other types of paneling (measures 1/8 inch thick). • 3/16" and 1/4" are thicker versions that are rarely used. • The face layers are made of softwood. This is because they are covered with wallpaper before installation.
RV Paneling Suppliers. ... The typical way an RV is assembled that has aluminum siding is with aluminum siding outwardly, a wood outline behind the paneling, protection, and afterward some open space. This space adds warmth to an RV that others with various siding panels don't have. However, exactly when you believed that Aluminum paneling ...
Video Overview: Install Shiplap RV Wall | Repair Window Leak. What material you should use depends on what materials do you want to use. I suggest using 1/8 birch veneer plywood when you are paneling your RV walls. It gives a look of vintage because it used to be one of the favorite materials back then, and it will give a cool look to your RV.
The two most common sizes you can buy luan plywood in, are 1/4 inch and 1/8 inch. There may be other thicknesses but these are the two standard sizes. Any thinner and you will have very weak wood that won't take a lot of effort to break. You do have other options when it comes to plywood.
Using capillary action to penetrate and restore wood, this can bring new life to paneling that's starting to weaken. Silicone Rubber Sealant. By adhering safely to wood, a silicone rubber sealant can help repair any leaks in the paneling itself. And with a full cure within 24 hours, this sealant will dry out quickly enough to get your RV back ...
Our products and on-site experts also allow us to provide the right recommendations and products to a wide-variety of industries where quality and customer service matter. Contact Us to learn how we can meet your specific needs. Robert Weed Corporation is a leading RV wall panel & countertop manufacturer. We are also offering RV paneling & RV ...
Azdel Onboard® Composite. Azdel Onboard composite panels have been used in RV exterior and interior sidewall, ceilings, and more since 2006. They are produced using a patented blend of polypropylene and fiberglass to create a strong, lightweight, quiet, weather and temperature resistant, odorless and environmentally friendly wall that will increase the life of your RV.
Consistent quality. RV manufacturers prefer T-PLY plywood products for their superior surfaces and their consistent cores, which offer enhanced fastener holding strength. These panels provide precision, high-grade strength in an industry with limited capacity for deviation or adjustments. Plywood & OSB RV Panels Brochure. T-PLY Overview Brochure.
Filon Interior Wall PanelsHomeFRP Panels for the RV IndustryApplicationsInterior PanelsVARIETEX & DESIGNS DECORATIVE PANELS Crane Composites interior frp sidewalls are moisture resistant and easy to clean. They are superior in both appearance and durability versus any other type of product with over 100 different colors, finishes, and patterns. VARIETEX Resilient textured and colored wall panels
G-Lite Luxe utilizes decorative hardwood faces such as birch, cherry, walnut, oak, and maple for an exceptional finish. Available in 8 ft. length. Applications. Cabinetry, Finished accessories. Thickness. 5mm, 9mm, 12mm, 15mm, 18mm. Learn more about our G-Lite plywood designed specifically for RV interior applications, including cabinet faces ...